Posts

Showing posts from November, 2020

Alpha

Image
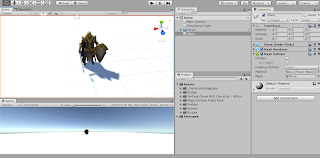
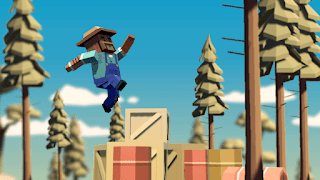
  This week I continued working on my game, I added a script that removes the old tiles behind my player to save space, I also made the different tiles spawn randomly in front of my player as he runs forward as I prepared a few different bridges in the prefabs folder. Once I did that I moved on to building the score system with the score showing up at the top left of the screen, as the player moves forward and gets further in the game the difficulty of the game increases. Next week I will focus on adding a death condition when my player collides with an obstacle, Once the player dies he will stop moving and also the score will stop and will be documented. I will also work on building a death menu with a small animation and the option to play again or return to the main menu. This week I didn't have much difficulty while developing the game.

Review Week: Comments and Feedback

Image
  Feedback in: From the comments I have received in my blog so far, I have gotten some positive feedback and good advice from the students which I find to be very helpful. I try to review the comments on my blog and see what advice from the blog comments I can implement in my work. The comments I find the most useful are the ones that give me good new ideas of what I can add to my existing game or how I can improve it all together, I'm very grateful for all the feedback I have gotten over this semester and It definitely is very helpful and encourages me to try and do better when building my game. The comments are also useful if you are interested in learning more about your classmates and it has made me realize that I have many things in common with some of my classmates. So far I enjoy the comments section of the module as its a different way of working with your classmates and not the same as group work. Feedback out: Looking back at all the comments I have left on other blogs I

Week 9: Reading And Writing

Image
Looking back at all the work I have done so far for this module, I thought the reading tasks would be much harder when I first found out about them, but each week as I read all the papers I found them to be quite informative and writing a blog about each reading task became easier as time passed. At first, the biggest difficulty I had was figuring out how to summarize each reading and what information would be most important to include in my blog, but with time I found that easier to do.  The writing assignments are not too bad for me but I find that sometimes it can be hard to write a blog after doing each task as some take me a few hours and once I'm done with the task I find myself to be tired and dreading to have to write a blog after, I have disciplined myself to write a blog each time. My favourite reading so far has been about the growth mindset as its something that I think is useful to learn, especially students. It was a good way to start the module by trying to implement

First Playable

Image
  This week I worked more on developing my game, I figured out how to add gravity to my character by adding a rigidbody to my player and I also made the player be able to go either left and right by going back to previous unity tutorials and implementing them into my game. I then added the appropriate code for the camera to follow my player as he runs forward, I also added a little camera animation at the begging of the scene to make it look more stylish and I restricted the camera on the x and y axis. I then moved on to making a variety of bridge/tile prefabs that will be spawned at random while the game is running. Once I had the bridge prefabs ready I created a tile manager in which I make the bridge prefabs spawn as the player moves forward.  This time I didn't have much difficulty while working on the game, although it was very time-consuming.  What I'm planning to develop next week in my game is to have the old tiles behind my player removed as he moves forward and to mak

Unity Tutorial 7

Image
  In this lesson, we complete three tutorials, the first one is called 'Watch where you go'. In this tutorial, we create a new prototype and download the starter files from the asset store. We then make the player rotate the camera in a circle around the map which looks like an island. The player is in the form of a sphere that can move around the map, the player can choose which texture they want to apply onto the sphere in the scene. We then apply force to the sphere and allow them to move forward or backwards. In tutorial 4.2 we create an enemy to challenge our player, we can also choose the texture we want to apply to our enemy. We then give the enemy the ability to bounce our player and make them fall off the map. At the end, we make the enemy able to spawn anywhere on the map and chase the player. In the last tutorial 4.3 we already have an enemy that can chase our player around the map but now we have to provide a way for our player to be able to defend themselves better

Game Fun

Image
  Image Source In the first reading, we learn about gamification design and can you have fun while designing games. The image above is the visualization of the gamification design process by Andrzej Marczewski. Andrzej says 'Fun is a byproduct of a good design. It is also not essential for a good gamified system'. Fun can only be the desired outcome and not a 'building block' in the design itself. The definition of fun in the context of games and gamification is defined as 'pleasurable engagement' Link to the first reading: Gamification Design The second paper is an academic piece, which is called 'Putting the fun factor into gaming: The influence of social contexts on experiences of playing videogames'. This study examines the influence of social processes in gameplay and different gaming contexts on the experience of individual and group flow when engaged in the activity. Flow is characterized as the positive subjective state an individual experiences

Prototype

Image
  screenshot from my developing game This week I started working on my prototype for my game, I downloaded the assets from the asset store and started working on making a character that moves across the map using the capsule. I created a character controller in which I make the character move forward and then I created a player prefab.  Once that was done I worked on adding a running animation to my character and put it on a loop. I then moved on to adding gravity and making the player move left and right, this was the part that I had difficulty with as the code I was using wasn't working in my PlayerMotor script. At the end, I added the bridge that my player will run on.

Unity Tutorial 6

Image
  Image Source In lesson 3.4, the game is pretty much finished and now we just focus on adding particles and sound effects to our game, without them our game is still pretty bland. We first choose which music we want to add to our game out of the three, once we pick the music we add it to the game and put it on a loop. The music will play in the background while the player runs through the screen.  We then move on and add an explosion particle to our player which activates when our player crashes into the obstacle. The explosion particle looks like a smoke explosion. Once we have our smoke explosion in the gameplay we add a dirt splatter to our player, we position the dirt splatter to make it seem like the player is kicking up ground as they sprint through the scene. Then at the end, we assign the sound effects we want to add to our player when he jumps and crashes. In lesson 3.4, we have to find solutions to the errors in the projects as there are many of them. The challenge outcomes

Game Decisions

Image
  Image Sour ce This week, the first reading covers adding learning and fun into applications. While making an app/game you should focus on making sure that learning to use the app/game is not difficult, the app should contain skills that most people already know, don't force them to learn anything new or they might be discouraged to use your app/game. Using pre-existing skills in an app or game means you can start using the app/game quickly and its not that deep. Here are some hacks for adding features to your app without turning users off: Segmenting features by user skill level, Layering less commonly used or expert features so they are out of the way, Creating a unifying UI metaphor that lets users understand new tools more easily. Elegant information architecture and clean visual design. Most games teach us new skills while also being fun because they use something called exploratory learning. You are given a goal You aren't told how to reach it  You can fail ( and be told

Game Design Document

Image
  Image Source I created my game design document on Dundoc, I found Dundoc to be easy to work with and the templates really helped me in structuring my document properly. Here is the link to my game design document: Escape Run

Unity Tutorial 05

Image
  Image Source In Unity tutorial 5, lesson 3.1 we start off by setting the background for our game, we then we set up a player character also adding a rigid body component and a box collider, we also create a playercontroller script.  Before we start the game we make the player jump and then we make the player jump by pressing the spacebar. Once we can see that our player jumps as we press spacebar, we then tweak the the jump force and gravity. We then use an if-statement to make sure the player doesn't double-jump.  Next we apply the MoveLeft script onto the background and create a spawn manager, we then write a function to spawn obstacles on a timer. In lesson 3.2 we focus on making the background repeat itself to make it seem like our character is moving forward. In order to make it seem like the world is rushing by, we need to reset the background objects position so it fits perfectly together.  By adding a box collider component to the background we fix the background repeat a

Games GDD

Image
In this blog, I will be covering game design documents and what they are. A GDD is a highly descriptive design document of the design for a video game. A game design document is both created and edited by the development team and it is used in the video game industry to organize efforts within a development team. The purpose of a game design document: Memory aid . Many important design decisions define how a game works in detail. Usually, the development of a game takes a significant amount of time, so you are likely to forget some early design decisions if they are not written down. Designers use design documents to record their design decisions as they are made. This way, you do not have to solve the same design problem multiple times                        Communication tool . Since you are often working with many people on a team to develop games, you will need an effective way of communicating design decisions. The communication with a design document is not one-directional and es