Posts

Unity Tutorial 8

Image
  In this weeks Unity tutorial, I learned how I can add music to my game. I started by creating an empty gameobject and added an audio source component to it, I then added the audio clip to it and put it on a loop to make sure it plays non stop. I made sure that the spatial blend slider is all the way on 2D, now when I'm in play mode I can hear the music playing right away. You can also mute the audio and change the volume if you want. Next, I added a new audio source and assigned it the health collectable audio clip. I used an audio source function called 'playoneshot 'which plays the audio clip only when needed. When Ruby collects a health collectable the audio clip will play at that moment. In the last Unity tutorial, I learned how I can share my finished game with others without them having to install the Unity Editor and downloading all my assets. I have enjoyed the Unity tutorials as going into this semester I was already comfortable using Unity and I learned a lot wh...

Unity Tutorial 6

Image
  In this weeks tutorial I learned how to add UI to my game t show the health of my character. To create a UI I first had to make a canvas which is a game object, I chose for the UI  to be displayed in a screen space which will display Ruby's health all the time and wont be hidden by any objects in the world. I also learned how to how to use the canvas scaler to fit the screen size of the player.  I then learned how to add an image to the UI which will be the health meter for Ruby. Once I had my health bar set up, I added an image of Ruby into the health meter to finish off the UI. I added a blue health bar to the meter to show Rubys health, if the bar is full it means that Ruby is health but if the bar is reduced to zero that means Ruby's heath is at zero. Once I finished I created a script for the health bar called UIHealthBar. In the next tutorial I added a new character to the world. The new character is a frog which Ruby can talk to and interact with. I added a dialo...

Tutorial 5

Image
  This week I added a Cinemachine package to my Unity project, a cinemachine allows you to create complex 3d camera setups in your game, allowing multiple cameras to have cuts and movement. I set up the cinemachine to follow my character. Now when Ruby walks around the map we can see the camera following her around. Once I did that I also added bounds to the camera so it won't show anything outside of the map.  In the second tutorial, I learned how to add particles to my game to add effects such as smoke for the broken robot. I used sprites as images to put on the particles. I made sure to pick a random sprite for each particle and I also learned how I can make particles fade away.

Reading 6

Image
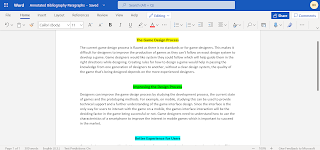
  This week I further worked on my annotated bibliographies, last week I coded and created themes within my annotated bibliographies and this week I wrote paragraphs for each theme. In each paragraph, I wrote a summary of each theme and included the most important points.  Here is a link to my document: https://tudublin-my.sharepoint.com/:w:/g/personal/b00129276_mytudublin_ie/Ee8ur-CgHrVKsKW4PIXJFz0BJFuLvF0xiqJ0SH-m4gjA_A?e=IT3GS9

Annotated Bibliography: Creating Themes

Image
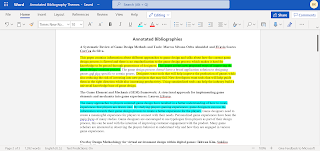
  I coded my annotated bibliographies and highlighted any recurring themes I could find. Here is the link to my document: https://tudublin-my.sharepoint.com/personal/b00129276_mytudublin_ie/_layouts/15/doc.aspx?sourcedoc={fd822af0-0393-4442-bc1e-25a4a14db27d}&action=edit

Reading 5: Annotated Bibliography

Image
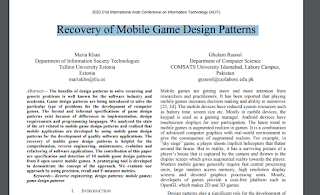
  Recovery of Mobile Game Design Patterns: Maria Khan and Ghulam Rasool. Game design patterns are being introduced to solve the problems for the development of computer games. The formal and informal instructions of game design patterns exist because of differences in implementation, design patterns and programming languages. The improvement of mobile game patterns is helpful for comprehension, reverse engineering, maintenance, evolution and refactoring of software applications. Mobile devices have decreased system resources such as battery size or screen size. In mobile devices, the keypad is used as a gaming manager and Android devices have touchscreens for user participation. The latest trend is mobile games is augmented reality. It has also been reported that playing mobile games increases the ability to memorize and decision making. Modern mobile games require fast central processing units, large random access memory, high-resolution screens and good graphics process...

Unity Tutorial 04

Image
  Now that I have already created a world with objects and characters, this week I worked on adding animations to my characters. To add an animation to a game object, you can use a component in Unity called an Animator. I created a new controller for my robot animations. Now I can add animations using my animator controller. I then learned how to create the illusion of movement by changing which sprite the sprite renderer uses over time and created new animations for my characters. I then created a projectile and learned how to launch it.

Annotated Bibliography

Image
  Interdisciplinary Approach to Complexity in Simulation Game Design and Implementation: Marcin Wardaszko. This paper looks at the problem of design and implementation in simulation games. The way we design games nowadays needs better design methods and more research. The aim of this article is to look into the current problem in simulation gaming and design and learn with the problems or through these circumstances. Its clear that the growing difficulty of the world will become a threat to game designers, which changes the way we need to look at game design. Design and implementation of a game interface interaction on a smartphone: Zhe Jia,b,∗, Wei-Hsin Huangcand Xincheng Zhang. This study focuses on how designers can provide a better experience for users and to make up for the fast prototyping methods for smartphone interface designers. By analyzing the development process, the current state of smartphone games and the prototyping methods, we can und...

Tutorial 3

Image
  In this tutorial, I learned how I can collectable objects to my game and how I can add a health stat to my character. I first had to add health to my character script, I also established the max health my character will be able to have and added it to my script. Now that I added max health to my character I learned how a 'trigger' works. Triggers are a special type of collider, they don't block the movement of the character but they still detect if the character collided with them. The triggers send the player a message if the character collides with them. I created a collectable Heath game object and created a collectable script to go with it. I then gave my character health using the script.  In the next tutorial, I added a damage zone to my game, if my character collides with the damage zone the health will go down by -1. I then learned how to resize the damage zone. At the end of the tutorial, I added an enemy into the damage zone and created a new script called the ...

Tutorial 2

Image
  In this week's tutorials I worked on decorating the world I created last week, I learned how to use sprites to decorate the world. I then learned how to change the order of the game objects so my character doesn't go through them and collides with them during gamelay. I then moved on to creating a prefab so I can create game objects with the exact same settings. At the end of this tutorial, I learned how to decorate my world with lots of items such as trees and houses. In the next tutorial, I learned all about the physics system in unity and how to use the character controller script to make sure my character can collide with the items in the world and doesn't just go through objects. I added a rigidbody and also disabled gravity for my character. I then added a collider to my game objects.

Doing The Annotated Bibliography

Image
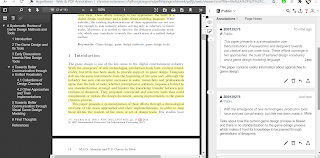
  This week I worked on my first few annotated bibliographies, the process took me longer than I expected and it was quite difficult to find the right academic papers and journals on my specific topic. After some research I found some suitable papers. I mostly focused on reading the abstract, introduction and conclusion which gave me a good understanding on what the papers covered and then I added my own annotations and created a summary of each paper. While doing the annotations was quite easy, it took me long to complete as there is not much relevant broad information. I also created my RefWorks account so I could easily find the journals and papers I worked on.

Annotated Bibliography

Image
A Systematic Review of Game Design Methods and Tools: Marcos Silvano Orita Almeida1 and Fl´avio Soares Corrˆea da Silva. This paper contains information about different approaches to game design and talks about how the current game design process is flawed and there is no standardization to the game design process which makes it hard for knowledge to be passed through generations of designers. This paper covers new proposed ways of improving the game design/ creation process. The game design process doesn't have a broad application solution to designing games and also specific to certain genres. Designers want tools that will help improve the production of games while also reducing the risk of investing into new projects that may fail. New developers want tools that will help guide them in the right direction while also increasing productivity. Using standardized tools can help the industry build a universal knowledge base of game design. The Game Element and Mechanic (GEM) framewo...

Tutorial 01

Image
 This week I started working on the unity tutorials again, I chose to work on the 2D project as I found it to be the most fitting option for me. After I downloaded a new version of unity I imported the new assets needed to start the project.  In the first tutorial, I learned how sprites work and how you can turn a sprite into a game object easily. Once I had my sprite ready I set the coordinates and created a new script and added some code to it. At the end of the tutorial, I was left with my character being able to go left and right across the screen. In the next tutorial, I worked on making my character being able to go across the screen horizontally and vertically using the keyboard, I also learned how to change the speed of my character in the game. In the last tutorial, I learned how to create a grid and a tilemap. I then learned how to create a tile palette and a tileset, at the end I painted my tilemap.

Planning

Image
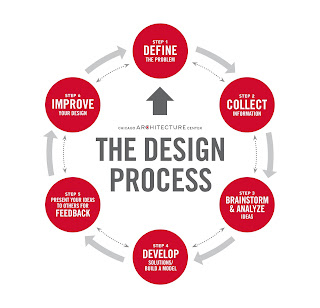
  For my topic I chose to research the 'Design Process'. I chose this topic as I thought it would be interesting to learn about and there would be a lot of information about it on the internet. Here are some links I found about my topic: The Game Design Process Game Design Process Designing Your Video Game Keywords For My Topic: Game Design Process Video Research Brainstorming Development Concepts Art Map Development Textures Functionality Interactivity Cinematics Promoting

Beta

Image
  At this point, I am mostly satisfied with my game, the game functions well and it is pretty much playable, this week I worked on trying to add a main menu to my game but unfortunately I was not successful as it wouldn't work, I will still try to make it work throughout the week.  Other than that I have worked on adding everything I planned into my game like the score system, I also made the game increase in difficulty as the player gets further. If I can fix the main menu I will add a high score to track the players progress and then the game will be finished.

Game Stories

Image
  The first reading called 'what every game developer needs to know about story' talks about what a story is and how to approach stories in games. Link to reading A story in games is similar to a story in movies but in different forms. The first attempts to make stories into movies were a failed attempt. The common misconceptions or mistakes that have been made in games are: Story is dialog Story doesn't matter Some people think that the story doesn't matter but that is not true, to get on the level that movies have reached, the same story problems have to be figured out for games just like the movies. If we develop games into the advanced story form that movies have become, we have to start learning everything that movies had to learn. McKee pointed out that the real substance of the story is conflict. Also, what a character eats, wears and drives is important but shallow, whats really important is what he chooses to do and what defines his character. A good story will...

Alpha

Image
  This week I continued working on my game, I added a script that removes the old tiles behind my player to save space, I also made the different tiles spawn randomly in front of my player as he runs forward as I prepared a few different bridges in the prefabs folder. Once I did that I moved on to building the score system with the score showing up at the top left of the screen, as the player moves forward and gets further in the game the difficulty of the game increases. Next week I will focus on adding a death condition when my player collides with an obstacle, Once the player dies he will stop moving and also the score will stop and will be documented. I will also work on building a death menu with a small animation and the option to play again or return to the main menu. This week I didn't have much difficulty while developing the game.

Review Week: Comments and Feedback

Image
  Feedback in: From the comments I have received in my blog so far, I have gotten some positive feedback and good advice from the students which I find to be very helpful. I try to review the comments on my blog and see what advice from the blog comments I can implement in my work. The comments I find the most useful are the ones that give me good new ideas of what I can add to my existing game or how I can improve it all together, I'm very grateful for all the feedback I have gotten over this semester and It definitely is very helpful and encourages me to try and do better when building my game. The comments are also useful if you are interested in learning more about your classmates and it has made me realize that I have many things in common with some of my classmates. So far I enjoy the comments section of the module as its a different way of working with your classmates and not the same as group work. Feedback out: Looking back at all the comments I have left on other blogs I ...

Week 9: Reading And Writing

Image
Looking back at all the work I have done so far for this module, I thought the reading tasks would be much harder when I first found out about them, but each week as I read all the papers I found them to be quite informative and writing a blog about each reading task became easier as time passed. At first, the biggest difficulty I had was figuring out how to summarize each reading and what information would be most important to include in my blog, but with time I found that easier to do.  The writing assignments are not too bad for me but I find that sometimes it can be hard to write a blog after doing each task as some take me a few hours and once I'm done with the task I find myself to be tired and dreading to have to write a blog after, I have disciplined myself to write a blog each time. My favourite reading so far has been about the growth mindset as its something that I think is useful to learn, especially students. It was a good way to start the module by trying to implement...

First Playable

Image
  This week I worked more on developing my game, I figured out how to add gravity to my character by adding a rigidbody to my player and I also made the player be able to go either left and right by going back to previous unity tutorials and implementing them into my game. I then added the appropriate code for the camera to follow my player as he runs forward, I also added a little camera animation at the begging of the scene to make it look more stylish and I restricted the camera on the x and y axis. I then moved on to making a variety of bridge/tile prefabs that will be spawned at random while the game is running. Once I had the bridge prefabs ready I created a tile manager in which I make the bridge prefabs spawn as the player moves forward.  This time I didn't have much difficulty while working on the game, although it was very time-consuming.  What I'm planning to develop next week in my game is to have the old tiles behind my player removed as he moves forward and ...